- Introduction
- Technical information
- Getting Started
- Description of functionality
- Screen Guides
- Cashflow Guides
- Budgeting and Forecasting
- Company Group Consolidation
Creating and Editing Charts of Accounts
The Chart of Accounts are imported with the Sage Transactions or created in ProudNumbers. They can be viewed and the report layout edited.
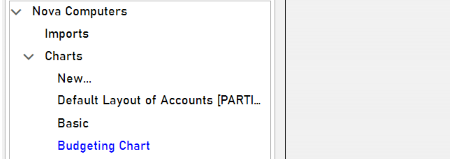
Chart of Accounts screen displays Charts imported from Sage in black, and Charts created in ProudNumbers from Sage imported Charts in blue.
Functions available from Chart screen:
Create new Chart of accounts

Only Charts imported from Sage can be used to create new Charts
Set reporting granularity (to display nominal accounts balances)
On default system reports on Nominal Category level.
By changing Chart of Accounts setting, reporting can be on individual nominal codes (Profit and Loss & Balance Sheet only) or nominal categories.

There are two settings for Charts of Accounts, both work on nominal category level
- Reporting account individually
- Reporting group
- 'Reporting account individually' option allows to report on nominal codes that belong to a nominal category individually.
- 'Reporting group' allows to change setting to report on individual nominal code for all Profit and Loss categories, Balance sheet categories or both.
The below example displays scenario where for category 'Other Sales' 'Reporting account individually' was selected.


Functions available from Chart screen available for Charts created in ProudNumbers only:
- Add Category
- Delete Category

Deleted categories are permanently removed.
Remove nominal code & Move Nominal codes to different groups or out of chart

The "Remove Nominal Code" function allows the removal of nominal codes from the Chart. If the red arrow is selected when a Category is chosen, all nominal codes in that Category are removed from the Chart. If an individual code is selected, only that specific code is removed.
Removed nominal codes are held in the right hand field. They cannot be deleted.
Nominal codes can be moved into different categories on the tree.
Add the nominal code back into the chart by selecting and dragging. The group may need expanding on the (+) to see the added code.

Removed nominal codes are held in the right hand field. They cannot be deleted.
Caution: this is not limited within the boundaries of P&L and Balance Sheet.
Check the chart before use - first SAVE!

Deleting a Chart of Accounts
To delete a Chart of Accounts, follow these steps:
Navigate to the Chart section of the application.
Select the specific chart you wish to delete.
From the top menu, click Edit, then select Delete.

A confirmation message will appear. Click OK to confirm the deletion.
Note: Only charts that have not been previously used for creating management accounts or budgeting can be deleted. If a chart has been used in these processes, the delete option will be unavailable